

In January 2016 I was lucky enough to attend a course at West Dean College called “Greenwood spoon carving with traditional tools”. As a keen woodworker with a reasonable amount of experience, I was interested in learning from a real expert. West Dean is an amazing place for art and craft courses and Nic Webb, our tutor, was not only a brilliant craftsman but an excellent teacher. I left West Dean 2 days later with 3 lovely spoons and a real passion for carving them.
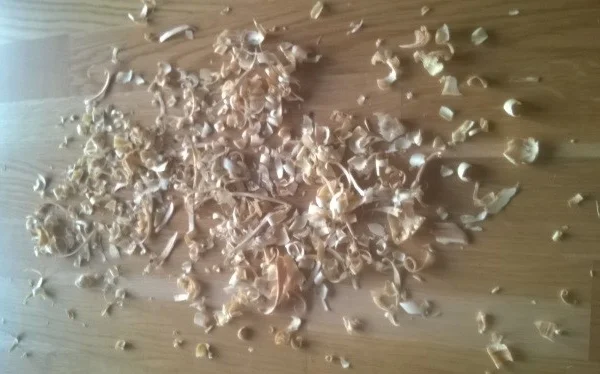
The humble wooden spoon is easily taken for granted. My friends all thought it was quite strange that I could dedicate precious time to what, at first glance, seemed to be a somewhat trivial activity. The pile of chippings on my sitting-room floor was certainly a source of amusement (they sweep-up very easily from parquet flooring, whereas with carpet I would think twice). However as the stack of spoons outgrew the chippings (the picture shows only a fraction of what I have made), the comments became more complimentary and requests for spoons started with more and more people interested in having a go themselves.

The fact is, making a spoon from a simple piece of greenwood is a hugely satisfying process, resulting in a rather attractive and useful object. It doesn’t take too long, nor does it require enormous effort. The tools you need are inexpensive to acquire and really quite simple to use, though there are some seriously sharp blades involved so its a good idea make sure you know how to use them safely and keep them sharp.
What follows is a short description of how I make spoons from greenwood. It is by no means the only way (and very possibly not the best way either) but as the pile of spoons testifies, is one I love.
The process begins with a log of freshly cut timber. I have reasonable access to hardwoods such as birch, sycamore, ash, willow and hazel. If I am lucky I manage to get my hands on wood from fruit tress such as cherry, apple, pear or plum. I cut the wood to a length about 1½ times the length of the desired spoon. Knots in the wood are much harder to work, so I would try and choose a section where there aren’t too many branches. The piece of wood doesn’t have to be straight as a natural curve can be utilised for the shape of the spoon.
The wood is split along its length to produce a billet from which the spoon can be carved. I have an old traditional tool called a “froe” which I really like, but an axe will also work fine. The force to split does not come from the froe or the axe but from a wooden or leather mallet. I draw the outline of the spoon bowl onto the billet with a pencil based on looking at the grain I can see in the split log and allowing the wood to suggest a shape. The handle of the spoon can also be drawn but generally I only mark the very top part. With the handle it is really the wood grain which dictates shape so all I am doing is marking where the handle will connect to the bowl.


Initial shaping of the spoon is done with an axe. This may sound dangerous to some but by holding the axe around the neck you actually have very good control and it is an excellent way of removing wood, either by splitting or, as by carving using the weight of the axe head to do the work for you.
A knife is used to finish off the back of the spoon bowl, giving it its final shape and making sure that tool marks from the axe have been completely removed. With my early attempts I moved on to the knife much too early. It’s a great way of doing detailed work but your fingers will thank you if you are able to get as close to the finished shape as possible with the axe. (Just in case you were worried, the axe work at least was done outside and not in my living room!)


Once the shape of the bowl is finished you can turn the spoon over and think about hollowing the bowl. I mark the thickness of the walls I would like with a pencil and then use a gouge to carve out the bowl. This is one process I really don’t like doing with the spoon held in my hands. It takes two hands to properly control a gouge and the tendency, especially at the beginning when there is no proper hollow, is for the tool to jump. I therefore mount the wood in a vice to save on the need for first aid. Once the hollow is roughly cut, the finish can be improved with a bent gouge or a crook knife. Like with the reverse side of the bowl, the aim is to get a nice smooth finish with no tool marks and to make sure that the wall thickness is even.


The final part of the carving process is to finish off the handle of the spoon. I always do this last as it provides support while carving the bowl and if the handle is too fine it might snap.

The spoon is now “finished” in its “wet” or greenwood state. It may look a bit rustic at this stage but do not fear. Before you can get the final finish the wood needs to dry out as sanding wet wood doesn’t work very well. The sandpaper just gets clogged up and the fibres of the wood sometimes get a bit fluffy, so it’s best to leave it for a few days. I start sanding with 120 grit paper and work down to 600. This gives me the wood a polished satiny finish, although some people prefer a rustic look and feel with knife marks still visible. All you need to do then is oil the spoon to protect the wood and its finished. I wouldn’t put a hand carved spoon in the dishwasher, but if it is protected with linseed oil or food-safe mineral oils, it is an object which not only looks great but can be put to good use too.
Want to try it out yourself?
William Torlot and Marcos Frangos are running regular weekend retreats at Hazel Hill Wood, near Salisbury. If you are interested, check out their upcoming events or get in touch to discuss the possibility of organising a workshop with Marcos and William.
If you want to find out more about green woodwork and their unique approach, have a look at the other Spoons and Spirit blog posts.
